Generating Certificates with Custom OIDs Using OpenSSL

This will be a quick walk-through inspired by a comment on my site https://certificatetools.com regarding the generation of certificates with custom OIDs (Object Identifiers). This is not something certificatetools.com can do natively, but my site offers all OpenSSL commands and configurations for all the certificates it generates. The information it provides significantly complements and expedites all kinds of X.509 related tasks you might do with OpenSSL.

Step One: Generate a certificate with certificatetools.com

Navigate to https://certificatetools.com. Enter a few common names, SANs, etc and customize the options to meet your needs. Be sure to select “Self-Sign” under CSR Options so that you get the configuration for the CSR AND the certificate. Next, click “Submit” at the bottom of the page.

Step Two: Expand the “OpenSSL Commands” section in the output provided by certificatetools.com and download the OpenSSL configurations

This output shows all OpenSSL commands certificatetools.com executed to generate your certificate and allows you to download all the configurations you’ll need to generate the same certificate offline on your own system. Click “csrconfig.txt” and “certconfig.txt” to download them both and make a new directory to put them in. It should look like the screenshot below.

Step Three: Customize the certconfig.txt configuration file you downloaded in step two to add any additional configurations not supported by certificatetools.com

This step is completely optional as you may only be doing these steps to make sure you’re generating your certificate offline to keep your private key as secure as possible. In the example below, I’ll mark red the three custom OIDs I’ve added to the configuration. Please note that I don’t know what values are expected for these particular OIDs, and for the purpose of this demonstration, I am just supplying an ASN1 printable string. You can read about other ways to supply values in the OpenSSL documentation https://www.openssl.org/docs/man1.1.0/man3/ASN1_generate_v3.html.

[ req ]
default_md = sha256
prompt = no
req_extensions = req_ext
distinguished_name = req_distinguished_name
[ req_distinguished_name ]
commonName = custom OID demonstration
countryName = US
stateOrProvinceName = Louisiana
localityName = Slidell
[ req_ext ]
subjectKeyIdentifier = hash
authorityKeyIdentifier = keyid:always,issuer
keyUsage=critical,digitalSignature,keyEncipherment
extendedKeyUsage=critical,serverAuth,clientAuth
1.3.6.1.4.1.311.2.1.21=ASN1:PRINTABLESTRING:example1
1.3.6.1.4.1.311.2.1.22=ASN1:PRINTABLESTRING:example2
1.3.6.1.5.5.7.3.17=ASN1:PRINTABLESTRING:example3
subjectAltName = @alt_names
[ alt_names ]
DNS.0 = custom OID demonstration

Step four: Run the commands from the output mentioned in step two

If you have the OpenSSL binary configured in the PATH variable on the system you’re using, you’ll be able to enter these commands directly. Otherwise, you’ll need to enter them supplying the full path of the OpenSSL binary. Make sure you change to the directory that you’ve downloaded all of the configuration files to in step two, or you’ll need to supply the full path to those files as well.

After running the commands, you should have a few new files in the directory with your configurations: “priv.key”, “cert.csr”, and “cert.crt”. These are your private key, certificate signing request, and certificate, respectively.

Step Five: Review your certificate to make sure it looks as expected

Depending on the operating system you’re using, you should be able to double click your certificate (cert.crt) to examine its contents. If you used the custom OIDs mentioned in step three, it should look much like the screenshot below.

I hope this post was helpful to someone out there. If so, or if you have any questions, please let me know in the comments!

Add a Layer of Security to Your Docker Environment Variables Without Swarm

Recently, the vendor of a system we support at work pushed us to deploy their application on a Microsoft Windows server using Docker. Their recommendation is to create a powershell script with all of the environment variables in it and run it at startup. The script contains multiple service account credentials and a password for an X.509 certificate in plain text. We weren’t comfortable leaving things this way, but all of the research we’d done indicated we need to be using kubernetes or Docker Swarm to be able to use the “secrets” feature that was designed for this sort of thing, so we were forced to be creative.

My first thought was to encrypt the script with OpenSSL with an asymmetric key-pair, but I knew I’d either end up with a plain text private key or a plain text password for an encrypted private key because OpenSSL doesn’t support any integration with the native Microsoft certificate store. I did some searching around for methods of encrypting and decrypting with powershell commands that could leverage the cert store and landed on this article https://sid-500.com/2017/10/29/powershell-encrypt-and-decrypt-data/. The idea was to use the concepts described in this article to encrypt the script at rest, and create a wrapper script that will decrypt the script on demand and run it.

This idea is not perfect and will not prevent visibility into the “sensitive” variables from prying eyes with access to the host. The variables will still be visible if the container is “inspected” (by running ‘docker inspect’), if the container is attached to and the variables are examined, or if the variables are dumped by logs of the application. It does however prevent the variables from being written in plain text to the disk and only allows the user with the private key in his or her certificate store to read the variables on the disk and execute the script.

If this method meets the security needs of your project or organization, you can implement it using the following steps:

  1. Log in as the user you’ll be starting the container with (important because the certificate will be in his or her certificate store) and run the following command to create a self-signed certificate with the necessary key usages:
    New-SelfSignedCertificate -DnsName DockerScript -CertStoreLocation "Cert:\CurrentUser\My" -KeyUsage KeyEncipherment,DataEncipherment, KeyAgreement -Type DocumentEncryptionCert
    
  2. Create a directory to store your scripts:
    mkdir C:\docker_scripts
  3. Copy your existing, plain text script into the new directory you created in the previous step, which may look something like the one below. We’ll call it plaintext_script.ps1.
    docker run -d `
    -p 443:443 `
    --rm `
    -e SECRETVARIABLE1='secretvalue1' `
    -e SECRETVARIABLE2='secretvalue2' `
    -e SECRETVARIABLE3='secretvalue3' `
    -e SECRETVARIABLE4='secretvalue4' `
    -e SECRETVARIABLE5='secretvalue5' `
    dockerhub/path
    
  4. Encrypt your plain text script using the command below:
    Get-Content "C:\docker_scripts\plaintext_script.ps1" | Protect-CmsMessage -To cn=DockerScript -OutFile "C:\docker_scripts\encrypted_script.txt"
    
  5. The contents of encrypted_script.ps1 should now look something like this:
    -----BEGIN CMS-----
    MIICggYJKoZIhvcNAQcDoIICczCCAm8CAQAxggFHMIIBQwIBADArMBcxFTATBgNVBAMMDERvY2tl
    clNjcmlwdAIQQ0qkyH2hNZFGNPy0GVUqGjANBgkqhkiG9w0BAQcwAASCAQBsYLHgpVFcznh7F/+k
    QJUz50W/m3yoYvUQvpKzTBczplxFyJdwnssdfnCaflqBTxg07ZeK6BCinkRy6LhLc2yPqVbWu6EU
    +DjkUAr2yF8gdqz++J1fJOToA2pUyecZuFvtrO5fJ0v4j6FPNZ7XkJBq+t/WwbTmWIuhJBbgk5ZT
    iMtA5Xs6xaUAlL/lRLNUPtiJHkzb2j2ATf/WxjKxeL/vDcVaFObBEkVbeVzFtfZsYCCDWweIz5aH
    uPSflxgNdn5a4yTBpZUUWV22EAgTXI5POZzhYceBtirAT3OOozIHhaaGyLGQMW8Mo1lZTq/PGJE1
    dbeeDf4AJS20NfbB5V0AMIIBHQYJKoZIhvcNAQcBMB0GCWCGSAFlAwQBKgQQuBxq7jWpGbet4Esv
    YqqeZYCB8K/+paawXUubezwWESjJ3go7sVdy2Fs8IoRVV1lB5FFAWP8Fqdr4/RlNgCL5fDfKJVWM
    lkCX4ksS7XHBHvYwo/uenskChb+JMki5PA0a00vkhMwXHclZhzBJOr9XMjUv0lv63fi0eLG/kUXx
    C5SlJ3Ui9Lepm2nSag+4EQSWrGBsdwiyCTTjUOTgILwSg+3GUSdlb10MmP5/d+ym25EXvBjdN/76
    gqr75m50hrPj8Q2q97e+0Nq9BUwAP8P+PPYJvc9FDBFurxgKeR5KfjTdWjQC60AckmVFmhr51GoO
    2hBjN1dU2/v9no8VkscSdrjybQ==
    -----END CMS-----
  6. Delete your plain text script:
    del C:\docker_scripts\plaintext_script.ps1
  7. Finally create a wrapper script that will decrypt your encrypted script on demand using the private key in the user’s certificate store and execute it. We’ll call it “docker_secure_wrapper.ps1”:
    $scriptPath = split-path -parent $MyInvocation.MyCommand.Definition
    
    $script = Unprotect-CmsMessage -Path "$scriptPath\encrypted_script.txt"
    
    Invoke-Command -ScriptBlock ([scriptblock]::Create($script))
  8. You can use the following command to automate the execution of the script above:
    powershell -executionpolicy unrestricted -command ". 'C:\docker_scripts\docker_secure_wrapper.ps1'"

    I’d love to hear your concerns and criticisms about this solution in the comments. Please share how you’ve dealt with this on your projects and in your work environment, especially while maintaining vendor support for those that don’t offer kubernetes and Docker Swarm based deployments.

Bootstrap Your MySQL or MariaDB Galera Cluster Using Systemd

I had a brief power outage this morning, and I had to go lookup how to bootstrap my MaridDB Galera cluster again. I’m finally documenting it here to share it with you!


Use the commands below to start the first node in a MariaDB Galera Cluster or bootstrap a failed cluster. Make sure you run these commands on the most up-to-date node! The rest of the nodes can be started normally after the first one has been bootstrapped.

systemctl set-environment MYSQLD_OPTS="--wsrep-new-cluster"
sed -i 's/safe_to_bootstrap: 0/safe_to_bootstrap: 1/g' /var/lib/mysql/grastate.dat
systemctl start mariadb
systemctl unset-environment MYSQLD_OPTS

For more information on the second command, see this article under the section “Safe to Bootstrap” Protection. These commands were tested on CentOS 7 running MariaDB 10.1.38. Let me know if it works for you in the comments.

Should IT Professionals Learn to Code?

Do you have a non-development career in technology? Do you ever ask yourself if it would be worth the time to learn to code? If so, rest assured; the answer is absolutely YES! But what do you have to gain by learning a programming language or two?


You will have a huge competitive edge in your industry.

My ability to troubleshoot and understand technology has increased exponentially since I made the decision to learn to develop. Programming forces you to understand what you’re doing at a deeper level. The first language I learned was PHP. This has led to my understanding of web servers, SEO, security, TLS/SSL, and enabled me to create websites. That is a short list, but this point cannot be stressed enough: You will have a profound new way of seeing and understanding how things work and why they work the way they do.

Automate your life!

Do you hate mundane, repetitive tasks? Me too, so I refuse to do them! Large-scale changes in Active Directory, migrating print servers, software installation, configuration changes, OS image creation, audits, the list is endless. Sometimes the tasks I’ve worked on were expected to take days, but I discovered ways to complete them within hours. Unfortunately, I’m too much of a show off to sandbag my work to enjoy the free time, but that too has paid off in raises and promotions.

Add value to the company you work for.

I work in the healthcare industry. IT isn’t adding value to the company. It’s just another cost of doing business. If your healthcare employer thinks he or she can save money by outsourcing IT, you’ll be out of a job. Think “the cloud…” Your customers are your “users,” and often times their perception is just that IT is always changing things and making their jobs harder. What if you could do something to automate their mundane tasks, saving them time, making them more productive and simplifying their jobs? This can change their perception of IT, save your company money and make them more efficient, allowing them to increase profits. Happy users and happy employer? Win-win!

This also has the potential to lead to promotions into positions that didn’t previously exist. If you can show your company ways of adding value that they’ve never thought of, it will set you apart in a big way. This proved especially true for me when I developed business intelligence dashboards, allowing senior management to get insight into real-time operations at a glance. If you want to stop punching the clock and have your performance measured in results rather than time and effort, this is a great way to do it! Can you say “job security?”

Become a creator.

Humans love to create! It’s in our DNA from birth, but building club-houses and whatever else it is we may want to do as adults can be expensive. Learning to write code can be free, and turning one of your ideas into a reality doesn’t have to cost you a dime. It also delivers the same pride and satisfaction you achieve from anything else you might create.

Become an entrepreneur or freelancer.

Being employed is fine, but if you have big ambitions in life to one day start your own business or otherwise become independent, your ability to code can be a huge asset.

Share your code with the world.

Your code may not be something you can sell, or perhaps you have no interest in marketing. You can host it on a GitHub repository for others to use. I see writing code sometimes like playing “The Sims.” A lot of satisfaction comes from building something and watching others use it. Interacting with other developers who are interested in using your code is also gratifying, and nothing compares to receiving an email thanking you for your work.

In conclusion, learning to code has absolutely improved my life. Everything we learn changes the way we perceive and interact with the world. When I see problems, I begin to imagine solutions in my mind. No more endless googling for a solution that may not even exist. Start learning to code today and become the solution!

To get started, check out the programming courses at Udemy.com.

What do you think? Leave your opinion in the comments!

Control Anything with Alexa Using Node.JS

I recently watched some interesting YouTube videos demonstrating the use of a python library called “fauxmo” to create fake Wemo plugs that Alexa can control. Unfortunately my python-fu isn’t as strong as I’d like it to be, so I searched npm for a similar library in Node.JS. The one I found wasn’t working for me, and I noticed others were complaining about the same thing in the repository’s GitHub issues. It was then I decided to make a new library, and thus node-fauxmo was born!


These personal projects are a lot to me like playing The SIMs. I like to create something and then watch the world use it. I don’t feel like this project is getting the attention it deserves, so I’m going to break down the installation, setup and provide a basic script to get you started.

Step 1 – Download and Install Node.JS

For starters, you’ll need to download and install Node.JS. Windows and macOS users will need to download it from here https://nodejs.org/en/download/. Linux users can install using their native package manager. I recommended searching for instructions specific to the distribution you’re running. Trust me, there are tons of them!

Step 2 – Make a Directory for Your Project

Make a directory somewhere to hold your project, launch a command prompt or terminal, and change into the directory you just created. In the example below, I’m making a folder on my Windows 10 Desktop named “control-alexa”.

C:\Users\Lyas> mkdir Desktop\control-alexa

C:\Users\Lyas> cd Desktop\control-alexa

C:\Users\Lyas\Desktop\control-alexa>

Step 3 – Download the node-fauxmo Library

Type the following command so that “node package manager” will download the node-fauxmo library for you to use in your project. You’ll notice a node_modules directory gets created containing the libraries and dependencies needed.

npm install node-fauxmo

Step 4 – Create the Configuration for Your Devices

Create a file named index.js in the directory and paste the following code into it.

'use strict';

const FauxMo = require('node-fauxmo');

let fauxMo = new FauxMo(
{
	devices: [{
		name: 'Fake Device 1',
		port: 11000,
		handler: function(action) {
			console.log('Fake Device 1:', action);
		}
	},
	{
		name: 'Fake Device 2',
		port: 11001,
		handler: function(action) {
			console.log('Fake Device 2:', action);
		}
	}]
});

This example will make 2 devices named “Fake Device 1” and “Fake Device 2”. They will listen on ports 11000 and 11001. Each device will need to listen on its own unique port. You can change this to anything you’d like usually between 1024 and 65,535 as long as it doesn’t conflict with ports used by an existing process. To make sure you’ve got everything where it belongs, here’s a screenshot of my directory. The package-lock.json file was created automatically and is not important in this case.

Step 5 – Start Your Devices!

Start your “fake” devices by running the command node index.js. This will cause node to start listening on UDP port 1900 for SSDP Discovery requests as well as listen on any TCP ports specified in your index.js configuration for On/Off requests from Alexa.

node index.js

If everything is working correctly, you should see output like the below text.

C:\Users\Lyas\Desktop\control-alexa>node index.js
Adding multicast membership for 192.168.1.198
Adding multicast membership for 127.0.0.1
server is listening on 11000
server is listening on 11001

If you get an error like “Error: bind EADDRINUSE 192.168.1.198:1900,” you’ll need to find which process is already listening on port 1900 and stop it. In my case, I am running Windows 10, and I needed to stop the native “SSDP Discovery” service. If this is the case for you too, you can use the command “net stop SSDPSRV” to stop it.

net stop SSDPSRV

Step 6 – Tell Alexa to Discover New Wemo Plugs

Finally launch your Alexa companion app and tell it to discover new Belkin Wemo plugs.

After the devices have been discovered, you can tell Alexa, “Turn on/off Fake Device 1.” In the output of the console/terminal you will see output like the below by default with “1” representing on and “0” representing off.

Fake Device 2: 1
Fake Device 2: 0
Fake Device 1: 1
Fake Device 1: 0
Fake Device 1: 1
Fake Device 1: 0

Now it’s time to get creative and write some custom javascript into the “handler” callback for your devices! It also comes in handy to make some Alexa “routines” with custom phrases more appropriate to whatever you may program her to do. For some inspiration, checkout my YouTube video where I get Alexa to launch Chrome and lock my PC using node-fauxmo. https://www.youtube.com/watch?v=tbjVvMIh810. Let me know in the comments what kinds of interesting, custom things you’re able to get Alexa to do and if you’re using some cool hardware like the Raspberry Pi to host your fake Wemo devices.

Get an A+ with Qualys SSL Labs Server Test on an Apache Web Server

Anyone responsible for hosting web services protected by SSL/TLS should be at least curious about how they might score against Qualys SSL Labs Server Test. I know I was when I first became aware of the tool. The results may surprise you, and you’ll probably learn a lot if you actually put the effort into securing and optimizing your configuration to get a higher score. I’d like to share some of my Apache configurations to hopefully save some folks out there a little time and raise awareness about web security.


I’ll start by removing all configurations I’ve added to achieve my A+ score, and we’ll slowly tighten the screws to see the effect each configuration has on the results of the test.

Ouch! If I’m being honest, I may have intentionally sabotaged my Apache config a little to get a score like this. Turns out if you’re running a fully patched CentOS 7 web server with Apache 2.4.6, it does an ok job of being secure out of the box. I enabled all possible ciphers, excluded the secure ones, and used a 1024-bit certificate issued by an untrusted CA to add a little dramatic effect. I tried to make things a little worse by enabling SSLv2 and v3, but they are no longer supported with the version of Apache I am using. Because I am unable to use that as an example here, just make sure you have a line like this in your Apache configuration to ensure all insecure SSL/TLS protocols are disabled.

SSLProtocol all -SSLv2 -SSLv3 -TLSv1

For our first change, let’s fix that certificate by requesting one using Let’s Encrypt with at least a 2048-bit private key. Make sure to check out CertificateTools.com for a super easy way to generate your CSR. It supports RSA and ECC keys and provides the OpenSSL commands so you can run them locally!

That’s good progress. We’ve gotten rid of a few warnings, but we still have an ugly “F”. Next we’ll make some changes to the supported ciphers.

Excellent! In these results, we notice that the server does not support “Forward Secrecy.” I intentionally left out the ECDHE suite of ciphers just to bring attention to this and stress the importance of making sure these ciphers are enabled. For our final cipher hardening and to fully support perfect forward secrecy, we need to make sure the following lines exist in our config.

SSLHonorCipherOrder on
SSLCipherSuite ALL:!aNULL:!eNULL:!LOW:!3DES:!MD5:!EXP:!PSK:!SRP:!DSS:!RC4

Looking good! Now to finally get our server to score that A+, we need to enable HTTP Strict Transport Security (HSTS). This is simply an additional web header that is stored in a browser for the amount of time specified in the header that tells the browser to force the use of HTTPS. This prevents software like SSLStrip from intercepting web requests and convincing your browser to use HTTP instead. This is a simple security feature that can be enabled by just adding a plugin to your wordpress, but Apache gives us a great way to enable it within our config using the following line.

Header always set Strict-Transport-Security "max-age=63072000; includeSubdomains; preload"

Perfect! Now we can technically go one step further with our HTTPS security by creating some additional headers to support a feature called HTTP Public Key Pinning (HPKP). This will tell your browser to store at least one certificate in the chain upon its first visit to a given site. If the next visit doesn’t contain the cached certificate in the chain, it will prevent the user from being able to visit the site. This is extremely effective at preventing man-in-the-middle (MITM) attacks, but requires a strong understanding of how it works and lots of diligence to maintain it properly. Currently only Chrome, Firefox and Opera support HPKP, and Chrome has announced plans to remove support for it because of the possibility for an attacker to install malicious pins or for a site operator to accidentally block visitors. Given that, it’s not something I would recommend, but I want to at least touch on it for completeness.

I hope this article was helpful and informative. Please leave questions and comments below.

Restore VHD Image to Disk/Partition with Linux dd

Convert a VHD image from a native Windows backup to raw format using qemu-img, and write it directly to a disk or partition with the Linux dd command

I’ve recently been evaluating native Windows Server Backup as an option for bare-metal backup and recovery for our remaining physical servers at work. The utility creates several XML files and a VHD image for each partition it backs up. It seems to work ok for the most part, but I ran into a problem when I came across a system that for some unknown reason had a 38MB boot partition with insufficient space to create a VSS snapshot, thus preventing the tool from properly backing up the partition. I’ve read all the articles about allocating storage on a separate partition to get VSS to behave, but I could never get it to function correctly.


This got me thinking… I have some personal trust issues with the reliability of Microsoft products to begin with and now I’m having these problems which are just reinforcing the fear of something going wrong during the restore process. This lead me to start researching restore options using the VHD files produced by the native Windows Server Backup.

Option 1 is to do a restore using a Windows installation CD and select the restore option. Option 2 is to mount the VHD and manually copy files. This option is really only good for individual file restores. Obviously this is not something you’d want to do for a bare metal restore. Option 3 is to restore the VHD image directly to disk. This is the option I was most interested in and it made sense to me that there would be a straightforward way of doing this as every other bare metal backup solution I’ve used had this sort of option. While searching for a tool to do a VHD to disk image I found “VHD2Disk”. Unfortunately this tool was designed to do just that… write a VHD to DISK. No option for writing to a partition. Feel free to correct me if I’m wrong, but I see no way of ever getting 2 partitions on a single disk with this tool which makes it useless for my purposes.

After finding that there were no tools to do a image to disk write I became curious to find out if there was a way to just use the dd command in linux. After all, I would have instinctively turned to dd if this were something I were doing with linux. dd does block by block copying and a block is a block regardless of which OS you’re using. I quickly learned this is not something that can be done directly with a VHD because they are not in raw format, but the qemu-img supports VHD format and has the ability to convert them to raw image format. Below you will find the detailed instructions of how to convert the VHD, and use dd to write your new image to disk or partition. I’ll also give some details about getting the system to boot if you’re like me in this case and you don’t have a good backup of the boot partition.

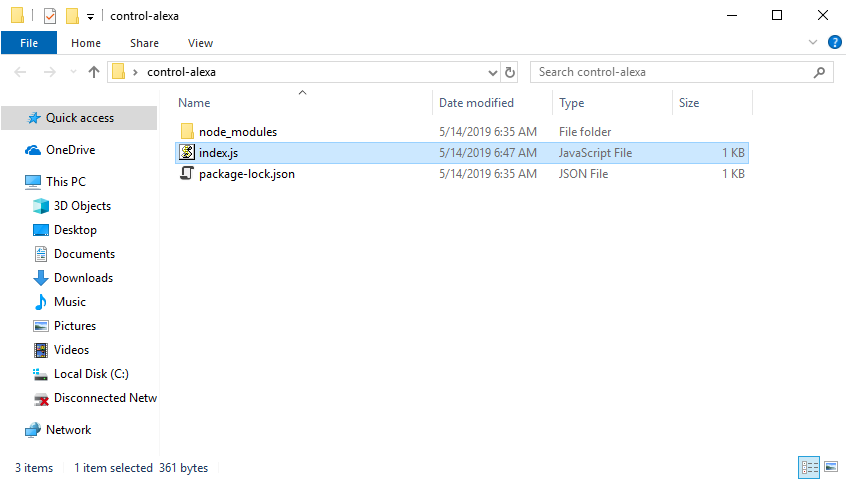
The backup directory created by Windows Server Backup will look like this. I’ve highlighted the “interesting files” that I’ll mention throughout the article. The one ending in “Components.xml” has useful information about the disk partition layout that can come in handy when recreating partitions on your new disk. The .vhd file is the actual image data.

vhd image files

First thing we need to do is convert the VHD image to raw format. To do so, you’ll need access to a linux environment and use the qemu-img command. I’d recommend using either a Clonezilla or GParted liveCD as they both have all sorts of utilities pre-installed for disk imaging and partitioning. Boot the CD on the system you will be using for the restore image. When it finishes booting type the following commands to install qemu-img: (You may need to type sudo before each command if you’re not root. Keep this in mind for the remaining command as well.)

apt-get update
apt-get install qemu-utils -y

My backups are on a windows file share so I’ll use the following command to mount them to the /mnt directory:

mount -t cifs -o username=YOURUSERNAME,domain=YOURDOMAIN //HOSTNAME/PATH /mnt

You’ll be prompted for your password to mount the share. Be sure to replace YOURUSERNAME, YOURPASSWORD, HOSTNAME, and PATH with the information appropriate for your environment.

Next change into the directory containing the VHD file you need to convert: (the path used in this command may vary greatly depending on your environment)

cd /mnt/WindowsImageBackup/SERVERNAME/Backup\ 2016-08-05\ 133013/

Use the following command to convert the VHD image into raw format:

qemu-img convert -f vpc -O raw c9887432-6c68-11e0-a354-806e6f6e6963.vhd myserver.raw

You’ll need to repeat this command for any additional partitions you need to convert. Be sure to change the .vhd and .raw filenames to those appropriate for your environment. To be clear, the .vhd filename should be the one that exists in this directory like the highlighted file in the screenshot above, and the .raw filename can be whatever you want to name it.

You’ll notice a new file will be created that will reflect the full size of the partition for the data it contains. This is expected considering the nature of the raw image format.

-rwxr-xr-x 1 root root  668 Aug  5 13:51 BackupSpecs.xml
-rwxr-xr-x 1 root root  61G Aug  5 13:51 c9887432-6c68-11e0-a354-806e6f6e6963.vhd
-rwxr-xr-x 1 root root 149G Aug  5 21:39 myserver.raw

The conversion process can take a long time depending on the size of the partition. You can use the following command to output the status of the process: (I’ve noticed there is often some delay before the command writes to stdout)

root@debian# kill -SIGUSR1 `pidof qemu-img`
root@debian#     (22.03/100%)

Next you’ll need to create the 100MB boot partition (unless you’re restoring only a single partition and all others are fully intact) and any additional partitions the system originally had. I’ll assume you know how to do this, but you can use the output below for help if necessary. In the event that you don’t know the original partition layout, you can use the raw image size as a hint or the “Components.xml” file generated by Windows Server Backup in the backup directory for the server. With the values BytesPerSector, PartitionOffset, and PartitionLength contained in that file, you can re-create the exact partition table.

BytesPerSector / PartitionOffset = starting sector
(BytesPerSector / PartitionOffset) + (BytesPerSector / PartitionLength) = ending sector

fdisk /dev/sda

Welcome to fdisk (util-linux 2.27).
Changes will remain in memory only, until you decide to write them.
Be careful before using the write command.


Command (m for help): n
Partition type
   p   primary (0 primary, 0 extended, 4 free)
   e   extended (container for logical partitions)
Select (default p): p
Partition number (1-4, default 1): 1
First sector (2048-335544319, default 2048):
Last sector, +sectors or +size{K,M,G,T,P} (2048-335544319, default 335544319): +100M

Created a new partition 1 of type 'Linux' and of size 100 MiB.

Command (m for help): t
Selected partition 1
Partition type (type L to list all types): 7
Changed type of partition 'Linux' to 'HPFS/NTFS/exFAT'.

Command (m for help): a
Selected partition 1
The bootable flag on partition 1 is enabled now.

Command (m for help): n
Partition type
   p   primary (1 primary, 0 extended, 3 free)
   e   extended (container for logical partitions)
Select (default p): p
Partition number (2-4, default 2):
First sector (206848-335544319, default 206848):
Last sector, +sectors or +size{K,M,G,T,P} (206848-335544319, default 335544319):

Created a new partition 2 of type 'Linux' and of size 159.9 GiB.

Command (m for help): t
Partition number (1,2, default 2): 2
Partition type (type L to list all types): 7

Changed type of partition 'Linux' to 'HPFS/NTFS/exFAT'.

Command (m for help): p
Disk /dev/sda: 160 GiB, 171798691840 bytes, 335544320 sectors
Units: sectors of 1 * 512 = 512 bytes
Sector size (logical/physical): 512 bytes / 512 bytes
I/O size (minimum/optimal): 512 bytes / 512 bytes
Disklabel type: dos
Disk identifier: 0x5dcc5434

Device     Boot  Start       End   Sectors   Size Id Type
/dev/sda1  *      2048    206847    204800   100M  7 HPFS/NTFS/exFAT
/dev/sda2       206848 335544319 335337472 159.9G  7 HPFS/NTFS/exFAT

Command (m for help): w
The partition table has been altered.
Calling ioctl() to re-read partition table.
Syncing disks.

If you created the 100MB boot partition, format it as NTFS and the default “System Reserved” label:

mkfs.ntfs -f /dev/sda1 -L "System Reserved"

The VHDs always store the image as a partition within the image which means we have to get the offset to determine where the data actually begins in the raw image before we write it to disk. Use the following command:

fdisk -l myserver.raw

Disk myserver.raw: 148.1 GiB, 158967767040 bytes, 310483920 sectors
Units: sectors of 1 * 512 = 512 bytes
Sector size (logical/physical): 512 bytes / 512 bytes
I/O size (minimum/optimal): 512 bytes / 512 bytes
Disklabel type: dos
Disk identifier: 0x00000000

Device        Boot Start       End   Sectors   Size Id Type
myserver.raw1        128 310483071 310482944 148.1G  7 HPFS/NTFS/exFAT

The values “512” and “128” are what we need from this output. This tells us that the block size is 512 bytes and the partition starts at sector 128. Now we have all the information we need to give dd to write the image to our physical disk using this command:

dd if=myserver.raw bs=512 skip=128 of=/dev/sda2

You’ll need to repeat this command for any additional partitions you need to restore. You can use the following command to get the status of the dd process:

kill -SIGUSR1 `pidof dd`

369665+0 records in
369665+0 records out
189268480 bytes (189 MB) copied, 12.4497 s, 15.2 MB/s

When the dd command finishes writing the image to /dev/sda2, you should be able to mount the NTFS partition and view the files like so:

mkdir /sda2
mount -t ntfs-3g /dev/sda2 /sda2
ls -l /sda2
total 6267677
lrwxrwxrwx 2 root root         60 Jul 14  2009 Documents and Settings -> /sda2/Users
-rwxrwxrwx 1 root root 6327107584 Jul 31 11:03 pagefile.sys
drwxrwxrwx 1 root root       4096 Feb 17  2015 Patch Management
drwxrwxrwx 1 root root          0 Jul 14  2009 PerfLogs
drwxrwxrwx 1 root root       4096 Jun 17 07:44 ProgramData
drwxrwxrwx 1 root root       4096 Jul 21  2014 Program Files
drwxrwxrwx 1 root root       4096 Mar 22  2013 Program Files (x86)
drwxrwxrwx 1 root root          0 Apr 21  2011 Recovery
drwxrwxrwx 1 root root       8192 Apr 22 19:10 $Recycle.Bin
drwxrwxrwx 1 root root       4096 Aug  6 13:30 System Volume Information
drwxrwxrwx 1 root root       4096 May 30 14:16 Users
drwxrwxrwx 1 root root      24576 May 30 14:07 Windows

After you’ve restored all of your partitions, its time to reboot. Don’t forget to make sure the boot flag is on for your boot partition. If you didn’t have a copy of the boot partition, you’ll need to use the windows installation CD to repair the MBR. This usually involves a combination of the startup repair option available from the installation CD as well as some of the boot repair utilities that you can use from a command prompt on the windows installation CD. Like these:

bootrec /fixboot
bootrec /fixmbr
bootrec /rebuildbcd
cdromdriveletter:\boot\bootsect\bootrec /nt60 SYS /mbr

UPDATE:

I recently found a cool new way of mounting the VHD image directly and imaging from the virtual block device instead of waiting for the qemu-img conversion and using up all of your precious storage for the VHD image you already have as well as a raw copy of the data. Below are the commands to enable the NBD kernel module with the right arguments, mount the VHD image as a virtual block device, and perform a dd copy to your physical disk. This is assuming you’ve already booted the liveCD, installed the qemu-utils, mounted the media containing your backups, and changed directly to the path containing the VHDs.

rmmod nbd
modprobe nbd max_part=16
qemu-nbd -c /dev/nbd0 c9887432-6c68-11e0-a354-806e6f6e6963.vhd
dd if=/dev/nbd0p1 of=/dev/sda2

You can see I’m using /dev/nbd0p1 as the source for the dd command. This is because as I mentioned earlier in the article, each VHD image contains a partition. nbd0p1 is referencing the first partition (the only partition) in the nbd0 virtual block device. Previously we had to specify the block size and offset with the dd command to specify where the partition started. Use the following command to remove the virtual block device for the VHD image.

qemu-nbd -d /dev/nbd0

If you have any questions or if you found this post useful, please leave a comment!

Delete User Profiles Remotely Windows XP/Vista/7/2008/2012

In my workplace, our helpdesk has a need for the ability to quickly and easily delete user profiles remotely. I did a little tinkering with wbemtest and found I could call the Delete() method on any of the WMI objects returned by the query “SELECT * FROM Win32_UserProfile.” It will properly delete the profile’s associated files and registry keys the same way that the windows native GUI tools do it. The problem with the native tool however, is that you need to be logged in to use it. It is fairly slow and clunky, and you can only select one profile at a time for deletion. This accounts for a lot of wasted time. So I took what I learned and created a little vbs script that made some WMI calls and deleted profiles. This worked great, but the help desk needs the ability to selectively choose which profiles get deleted through some form of user interface. I wanted the simplest possible solution that required no dependencies. (.NET, AutoIT DLL’s, etc). I found the best way to do that was to make an HTA application.


The first version of my profile cleanup HTA was very basic but served its purpose well. The problem was everything was done using synchronous WMI calls. I’ve recently been playing with a lot of Node.js to understand this whole “non-blocking IO” asynchronous programming methodology, and it got me wondering if I could do the same with this HTA application. It’s not difficult to find examples online for creating WMI queries and calling methods asynchronously, but getting them to play nice in the HTA application proved to be a challenge. At least for me : ).

One problem I had was certain things only worked using jScript, while other things only worked using VBscript. Fortunately I found a way to use both and reference functions in both languages from either language. The next problem I had was finding a way to reference the “WbemScripting.SWbemSink” object within HTA. The way I found to do it was by referencing the object by its class ID like so:

<object id="oSink" classid="clsid:75718C9A-F029-11D1-A1AC-00C04FB6C223"></object>

My first attempts at improving the UI was to make the function calls using the setTimeout javascript function but that didn’t seem to change anything. To prevent the windows from freezing I had to do everything asynchronously within WMI. I’m including links to both versions of the application. The old version should really only be used for educational purposes for developers interested in a before and after demonstration of asynchronous WMI vs standard synchronous WMI. The second version works quite well and is safe to use in production. Just be sure you don’t accidentally delete some important data in a user’s profile. Any comments, suggestions, improvements or questions are welcome!

Profile Cleanup Utility - Delete User Profiles

Download HTA Delete User Profiles Utility

Profile Cleanup

Profile Cleanup_V2

GitHub Repo (Latest Build)

Two Factor Authentication with Freeradius for Horizon View

At work we were evaluating different options to enable two factor authentication for VMware Horizon View. They were all more than we were interested in paying and none had the ability to integrate with the communication platforms that we were interested in utilizing for delivering the PIN used as the “second factor”. Given that, my director gave me the opportunity to innovate and develop something custom.


Before we get started, you should know that I will not be providing a complete solution for two factor authentication with freeradius. My intention in this post is to demonstrate a working example of freeradius issuing an Access-Challenge response to a VMware View authentication request to achieve two factor authentication. Further development will be necessary to provide a full “solution”. (Integrating the freeradius perl module with LDAP or some other central authentication mechanism as well as deliver PINs and validate them.) If you have any questions in regards to how I achieved this, feel free to ask in the comments.

I had been looking for a good reason to play with freeradius and I finally had one. After some research within VMware’s documentation I knew I needed to learn how to get freeradius to send an “Access-Challenge” response.

https://pubs.vmware.com/view-52/index.jsp?topic=%2Fcom.vmware.view.administration.doc%2FGUID-73027CC6-8EA6-4887-A1F7-B40BF664E353.html
“If the RADIUS server issues an access challenge, View Client displays a dialog box similar to the RSA SecurID prompt for the next token code.”

Unfortunately, getting freeradius to do this is not well documented, but here are a few links I used for my research:
http://wiki.freeradius.org/guide/multiOTP-HOWTO
https://lists.freeradius.org/pipermail/freeradius-users/2008-August/030680.html
http://motp.sourceforge.net/
http://lists.freeradius.org/pipermail/freeradius-users/2011-January/051466.html
https://www.howtoforge.com/how-to-use-freeradius-with-linotp-2-to-do-two-factor-authentication-with-one-time-passwords
http://lists.freeradius.org/pipermail/freeradius-users/2012-May/060929.html
http://techtitude.blogspot.com/2014/12/freeradius-pap-challenge-authentication.html
http://lists.freeradius.org/pipermail/freeradius-users/2009-February/035675.html
http://www.mail-archive.com/freeradius-users@lists.freeradius.org/msg47441.html
http://lists.freeradius.org/pipermail/freeradius-users/2013-February/065099.html

I also read a few chapters from this book to get a better understanding of the configuration and inner workings of freeradius.

After all my research I used the example.pl code that comes with the freeradius perl module and modified the authenticate function like so:

sub authenticate {
        # For debugging purposes only
#       &log_request_attributes;
        if ($RAD_REQUEST{'State'} eq "0x6368616c6c656e6765") {
                if($RAD_REQUEST{'User-Password'} eq "1234") {
                        $RAD_REPLY{'Reply-Message'} = "Access granted";
                        return RLM_MODULE_OK;
                } else {
                        $RAD_REPLY{'Reply-Message'} = "Denied access by rlm_perl function";
                        return RLM_MODULE_REJECT;
                }
        } else {
                if($RAD_REQUEST{'User-Name'} eq "testusernamehere" && $RAD_REQUEST{'User-Password'} eq "testpasswordhere") {
                        $RAD_REPLY{'State'} = "challenge";
                        $RAD_CHECK{'Response-Packet-Type'} = "Access-Challenge";
                        $RAD_REPLY{'Reply-Message'} = "Enter your PIN.";
                } else {
                        $RAD_REPLY{'Reply-Message'} = "Denied access by rlm_perl function";
                        return RLM_MODULE_REJECT;
                }
        }
}

The code above is extremely bare-bones and serves only as an example to use the perl module with freeradius to send an authenticator an Access-Challenge response to an authentication request. You will want to modify the “testusernamehere” and “testpasswordhere” strings to something more appropriate and optionally the “1234” test PIN. This code first authenticates a user by validating their username and password. If it is successful, an Access-Challenge response is sent to the authenticator and the “State” AVP (Attribute-Value Pair) is set to “challenge”. When the authenticator receives the Access-Challenge it prompts for a PIN. When the PIN is entered, the request is processed by the first block of code because the text value of the “State” AVP (challeng) now matches the hexadecimal string “0x6368616c6c656e6765” in the first if statement. This happens because in the previous request we set the State AVP to be equal to “challenge” which is the text equivalent to the hexadecimal string “0x6368616c6c656e6765”. The same User-Name is sent as used previously, but this time User-Password must match “1234”. Any other PIN will cause authentication to fail.

Here are screenshots of the Horizon View client authentication behavior using a freeradius server with this configuration.

two factor authentication vmware view first factor

two factor authentication vmware view second factor

Show multicast IGMP group memberships on Cisco IOS, Windows, and Linux

I’ve been doing a lot of playing with multicast lately and I always have to google for a while to find these commands. I figured it was time to throw a post together for a quick reference. Hopefully someone else can benefit from this too.


Below you can find the commands to determine whether a system or switch port is a member of a multicast group on Cisco IOS, windows and linux. Multicast uses IGMP to join these groups and there is no way to join a group manually. The operating system does it automatically when an application requests it so these commands can come in handy when you’re trying to figure out why you’re not seeing the multicast traffic that you’re expecting.

Cisco IOS:

show ip igmp snooping groups

Windows:

netsh interface ip show joins

Linux:

ip maddress show

or

netstat -ng