Bootstrap Your MySQL or MariaDB Galera Cluster Using Systemd

I had a brief power outage this morning, and I had to go lookup how to bootstrap my MaridDB Galera cluster again. I’m finally documenting it here to share it with you!


Use the commands below to start the first node in a MariaDB Galera Cluster or bootstrap a failed cluster. Make sure you run these commands on the most up-to-date node! The rest of the nodes can be started normally after the first one has been bootstrapped.

systemctl set-environment MYSQLD_OPTS="--wsrep-new-cluster"
sed -i 's/safe_to_bootstrap: 0/safe_to_bootstrap: 1/g' /var/lib/mysql/grastate.dat
systemctl start mariadb
systemctl unset-environment MYSQLD_OPTS

For more information on the second command, see this article under the section “Safe to Bootstrap” Protection. These commands were tested on CentOS 7 running MariaDB 10.1.38. Let me know if it works for you in the comments.

Should IT Professionals Learn to Code?

Do you have a non-development career in technology? Do you ever ask yourself if it would be worth the time to learn to code? If so, rest assured; the answer is absolutely YES! But what do you have to gain by learning a programming language or two?


You will have a huge competitive edge in your industry.

My ability to troubleshoot and understand technology has increased exponentially since I made the decision to learn to develop. Programming forces you to understand what you’re doing at a deeper level. The first language I learned was PHP. This has led to my understanding of web servers, SEO, security, TLS/SSL, and enabled me to create websites. That is a short list, but this point cannot be stressed enough: You will have a profound new way of seeing and understanding how things work and why they work the way they do.

Automate your life!

Do you hate mundane, repetitive tasks? Me too, so I refuse to do them! Large-scale changes in Active Directory, migrating print servers, software installation, configuration changes, OS image creation, audits, the list is endless. Sometimes the tasks I’ve worked on were expected to take days, but I discovered ways to complete them within hours. Unfortunately, I’m too much of a show off to sandbag my work to enjoy the free time, but that too has paid off in raises and promotions.

Add value to the company you work for.

I work in the healthcare industry. IT isn’t adding value to the company. It’s just another cost of doing business. If your healthcare employer thinks he or she can save money by outsourcing IT, you’ll be out of a job. Think “the cloud…” Your customers are your “users,” and often times their perception is just that IT is always changing things and making their jobs harder. What if you could do something to automate their mundane tasks, saving them time, making them more productive and simplifying their jobs? This can change their perception of IT, save your company money and make them more efficient, allowing them to increase profits. Happy users and happy employer? Win-win!

This also has the potential to lead to promotions into positions that didn’t previously exist. If you can show your company ways of adding value that they’ve never thought of, it will set you apart in a big way. This proved especially true for me when I developed business intelligence dashboards, allowing senior management to get insight into real-time operations at a glance. If you want to stop punching the clock and have your performance measured in results rather than time and effort, this is a great way to do it! Can you say “job security?”

Become a creator.

Humans love to create! It’s in our DNA from birth, but building club-houses and whatever else it is we may want to do as adults can be expensive. Learning to write code can be free, and turning one of your ideas into a reality doesn’t have to cost you a dime. It also delivers the same pride and satisfaction you achieve from anything else you might create.

Become an entrepreneur or freelancer.

Being employed is fine, but if you have big ambitions in life to one day start your own business or otherwise become independent, your ability to code can be a huge asset.

Share your code with the world.

Your code may not be something you can sell, or perhaps you have no interest in marketing. You can host it on a GitHub repository for others to use. I see writing code sometimes like playing “The Sims.” A lot of satisfaction comes from building something and watching others use it. Interacting with other developers who are interested in using your code is also gratifying, and nothing compares to receiving an email thanking you for your work.

In conclusion, learning to code has absolutely improved my life. Everything we learn changes the way we perceive and interact with the world. When I see problems, I begin to imagine solutions in my mind. No more endless googling for a solution that may not even exist. Start learning to code today and become the solution!

To get started, check out the programming courses at Udemy.com.

What do you think? Leave your opinion in the comments!

Control Anything with Alexa Using Node.JS

I recently watched some interesting YouTube videos demonstrating the use of a python library called “fauxmo” to create fake Wemo plugs that Alexa can control. Unfortunately my python-fu isn’t as strong as I’d like it to be, so I searched npm for a similar library in Node.JS. The one I found wasn’t working for me, and I noticed others were complaining about the same thing in the repository’s GitHub issues. It was then I decided to make a new library, and thus node-fauxmo was born!


These personal projects are a lot to me like playing The SIMs. I like to create something and then watch the world use it. I don’t feel like this project is getting the attention it deserves, so I’m going to break down the installation, setup and provide a basic script to get you started.

Step 1 – Download and Install Node.JS

For starters, you’ll need to download and install Node.JS. Windows and macOS users will need to download it from here https://nodejs.org/en/download/. Linux users can install using their native package manager. I recommended searching for instructions specific to the distribution you’re running. Trust me, there are tons of them!

Step 2 – Make a Directory for Your Project

Make a directory somewhere to hold your project, launch a command prompt or terminal, and change into the directory you just created. In the example below, I’m making a folder on my Windows 10 Desktop named “control-alexa”.

C:\Users\Lyas> mkdir Desktop\control-alexa

C:\Users\Lyas> cd Desktop\control-alexa

C:\Users\Lyas\Desktop\control-alexa>

Step 3 – Download the node-fauxmo Library

Type the following command so that “node package manager” will download the node-fauxmo library for you to use in your project. You’ll notice a node_modules directory gets created containing the libraries and dependencies needed.

npm install node-fauxmo

Step 4 – Create the Configuration for Your Devices

Create a file named index.js in the directory and paste the following code into it.

'use strict';

const FauxMo = require('node-fauxmo');

let fauxMo = new FauxMo(
{
	devices: [{
		name: 'Fake Device 1',
		port: 11000,
		handler: function(action) {
			console.log('Fake Device 1:', action);
		}
	},
	{
		name: 'Fake Device 2',
		port: 11001,
		handler: function(action) {
			console.log('Fake Device 2:', action);
		}
	}]
});

This example will make 2 devices named “Fake Device 1” and “Fake Device 2”. They will listen on ports 11000 and 11001. Each device will need to listen on its own unique port. You can change this to anything you’d like usually between 1024 and 65,535 as long as it doesn’t conflict with ports used by an existing process. To make sure you’ve got everything where it belongs, here’s a screenshot of my directory. The package-lock.json file was created automatically and is not important in this case.

Step 5 – Start Your Devices!

Start your “fake” devices by running the command node index.js. This will cause node to start listening on UDP port 1900 for SSDP Discovery requests as well as listen on any TCP ports specified in your index.js configuration for On/Off requests from Alexa.

node index.js

If everything is working correctly, you should see output like the below text.

C:\Users\Lyas\Desktop\control-alexa>node index.js
Adding multicast membership for 192.168.1.198
Adding multicast membership for 127.0.0.1
server is listening on 11000
server is listening on 11001

If you get an error like “Error: bind EADDRINUSE 192.168.1.198:1900,” you’ll need to find which process is already listening on port 1900 and stop it. In my case, I am running Windows 10, and I needed to stop the native “SSDP Discovery” service. If this is the case for you too, you can use the command “net stop SSDPSRV” to stop it.

net stop SSDPSRV

Step 6 – Tell Alexa to Discover New Wemo Plugs

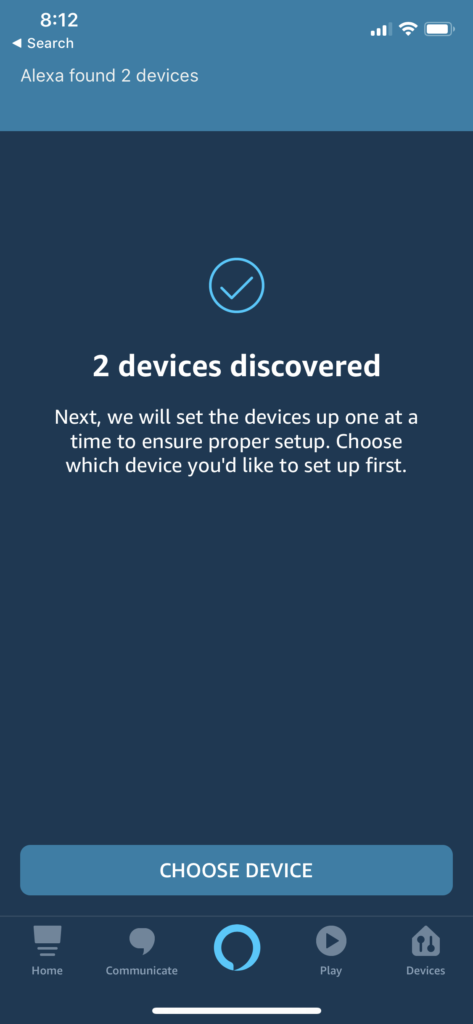
Finally launch your Alexa companion app and tell it to discover new Belkin Wemo plugs.

After the devices have been discovered, you can tell Alexa, “Turn on/off Fake Device 1.” In the output of the console/terminal you will see output like the below by default with “1” representing on and “0” representing off.

Fake Device 2: 1
Fake Device 2: 0
Fake Device 1: 1
Fake Device 1: 0
Fake Device 1: 1
Fake Device 1: 0

Now it’s time to get creative and write some custom javascript into the “handler” callback for your devices! It also comes in handy to make some Alexa “routines” with custom phrases more appropriate to whatever you may program her to do. For some inspiration, checkout my YouTube video where I get Alexa to launch Chrome and lock my PC using node-fauxmo. https://www.youtube.com/watch?v=tbjVvMIh810. Let me know in the comments what kinds of interesting, custom things you’re able to get Alexa to do and if you’re using some cool hardware like the Raspberry Pi to host your fake Wemo devices.