This will be a quick walk-through inspired by a comment on my site https://certificatetools.com regarding the generation of certificates with custom OIDs (Object Identifiers). This is not something certificatetools.com can do natively, but my site offers all OpenSSL commands and configurations for all the certificates it generates. The information it provides significantly complements and expedites all kinds of X.509 related tasks you might do with OpenSSL.
Step One: Generate a certificate with certificatetools.com
Navigate to https://certificatetools.com. Enter a few common names, SANs, etc and customize the options to meet your needs. Be sure to select “Self-Sign” under CSR Options so that you get the configuration for the CSR AND the certificate. Next, click “Submit” at the bottom of the page.
Step Two: Expand the “OpenSSL Commands” section in the output provided by certificatetools.com and download the OpenSSL configurations
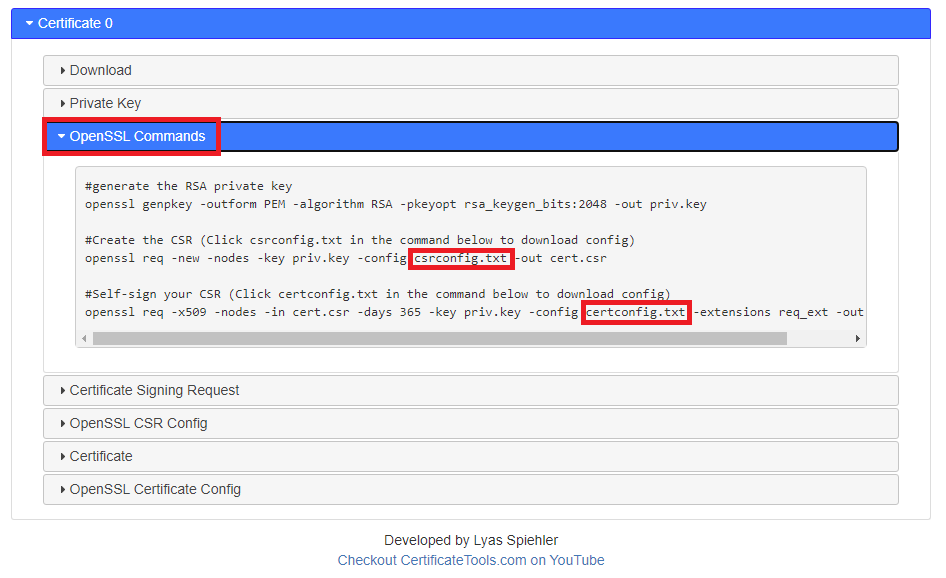
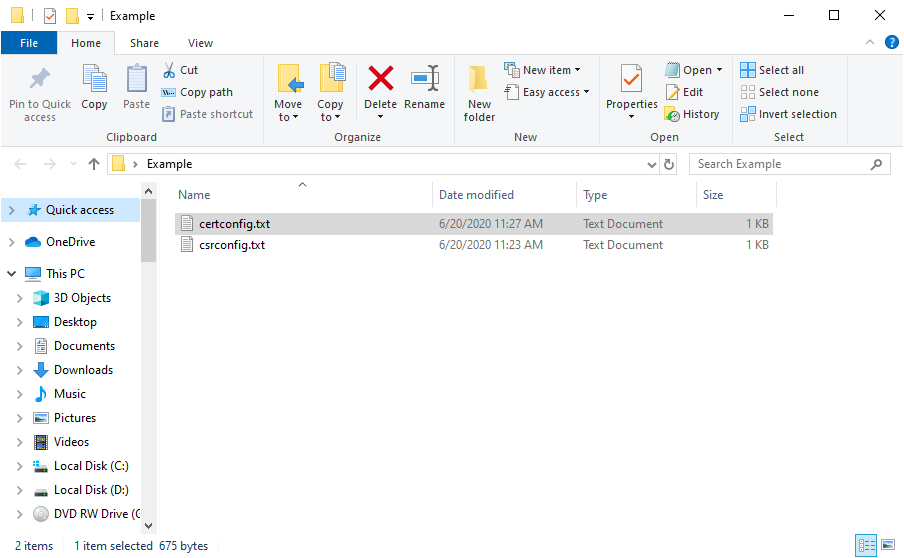
This output shows all OpenSSL commands certificatetools.com executed to generate your certificate and allows you to download all the configurations you’ll need to generate the same certificate offline on your own system. Click “csrconfig.txt” and “certconfig.txt” to download them both and make a new directory to put them in. It should look like the screenshot below.
Step Three: Customize the certconfig.txt configuration file you downloaded in step two to add any additional configurations not supported by certificatetools.com
This step is completely optional as you may only be doing these steps to make sure you’re generating your certificate offline to keep your private key as secure as possible. In the example below, I’ll mark red the three custom OIDs I’ve added to the configuration. Please note that I don’t know what values are expected for these particular OIDs, and for the purpose of this demonstration, I am just supplying an ASN1 printable string. You can read about other ways to supply values in the OpenSSL documentation https://www.openssl.org/docs/man1.1.0/man3/ASN1_generate_v3.html.
[ req ]

default_md = sha256

prompt = no

req_extensions = req_ext

distinguished_name = req_distinguished_name

[ req_distinguished_name ]

commonName = custom OID demonstration

countryName = US

stateOrProvinceName = Louisiana

localityName = Slidell

[ req_ext ]

subjectKeyIdentifier = hash

authorityKeyIdentifier = keyid:always,issuer

keyUsage=critical,digitalSignature,keyEncipherment

extendedKeyUsage=critical,serverAuth,clientAuth

1.3.6.1.4.1.311.2.1.21=ASN1:PRINTABLESTRING:example1

1.3.6.1.4.1.311.2.1.22=ASN1:PRINTABLESTRING:example2

1.3.6.1.5.5.7.3.17=ASN1:PRINTABLESTRING:example3

subjectAltName = @alt_names

[ alt_names ]

DNS.0 = custom OID demonstration
Step four: Run the commands from the output mentioned in step two
If you have the OpenSSL binary configured in the PATH variable on the system you’re using, you’ll be able to enter these commands directly. Otherwise, you’ll need to enter them supplying the full path of the OpenSSL binary. Make sure you change to the directory that you’ve downloaded all of the configuration files to in step two, or you’ll need to supply the full path to those files as well.
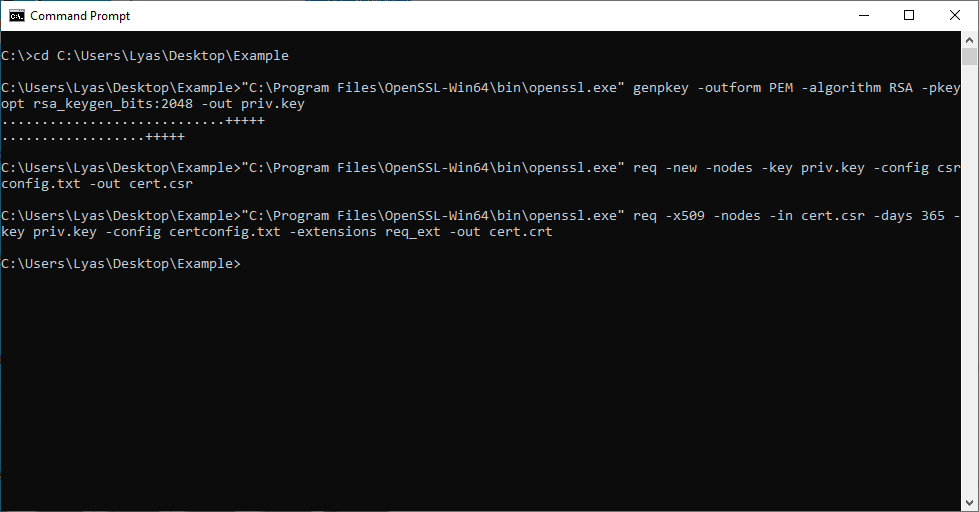
After running the commands, you should have a few new files in the directory with your configurations: “priv.key”, “cert.csr”, and “cert.crt”. These are your private key, certificate signing request, and certificate, respectively.
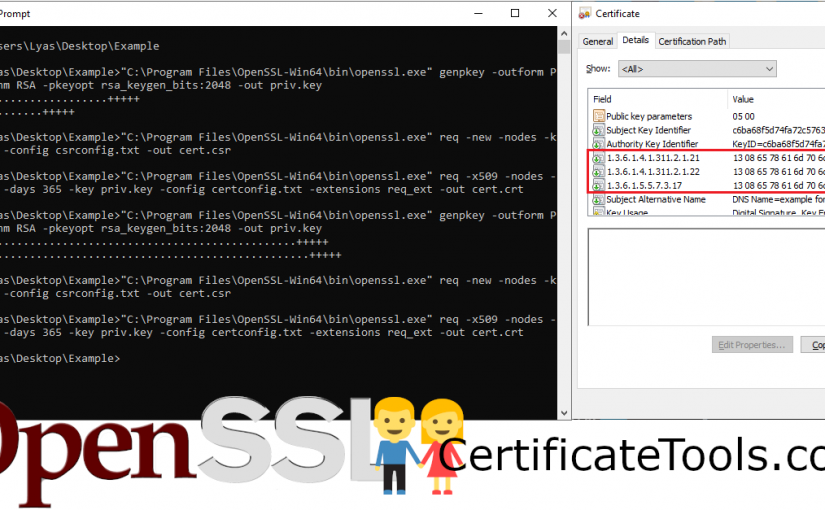
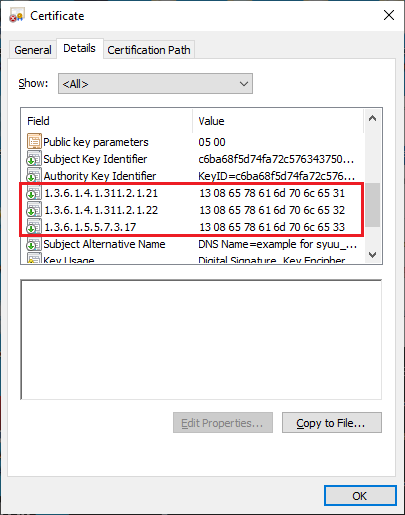
Step Five: Review your certificate to make sure it looks as expected
Depending on the operating system you’re using, you should be able to double click your certificate (cert.crt) to examine its contents. If you used the custom OIDs mentioned in step three, it should look much like the screenshot below.
I hope this post was helpful to someone out there. If so, or if you have any questions, please let me know in the comments!